Set Review ➟ LEGO® 60295 STUNTZ Stunt Show Arena
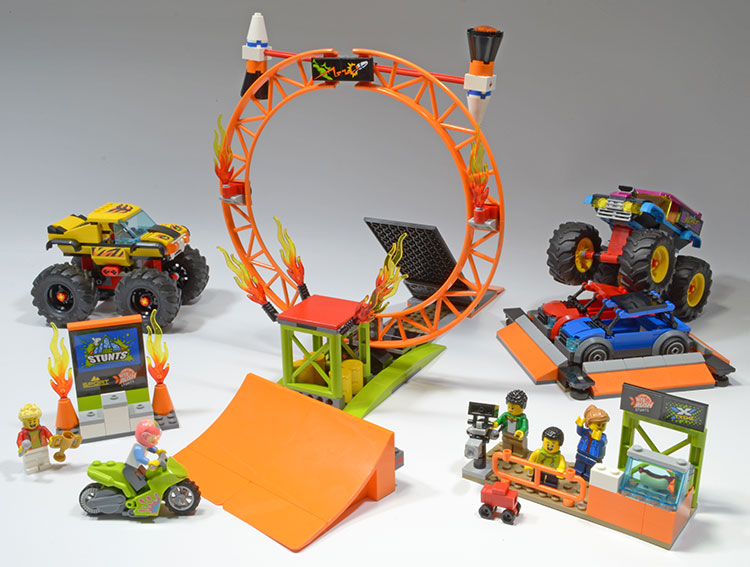
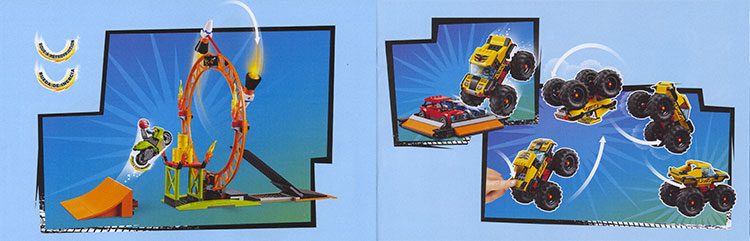
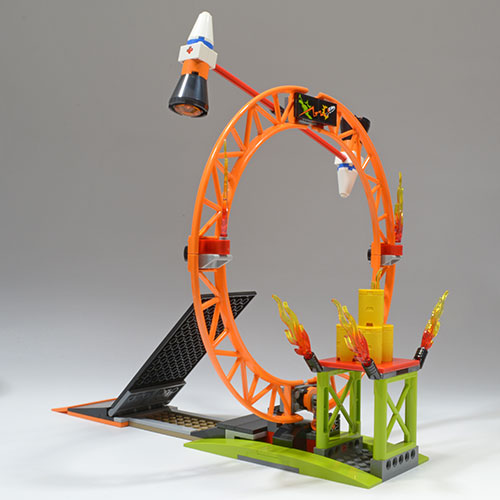
The Stunt Show Arena is actually less arena and more of what’s going on inside the arena. This is a good thing. A really really good thing. We have a motorcycle jumping through a perilous hoop with fire and two monster trucks doing monster truck things. It’s definitely fun. So. Much. Fun.
The Build
The set includes six instruction books which aren’t numbered, and the build can proceed non-sequentially as each book essentially creates a standalone component. One book provides instructions for the hoop, two of them provide for the two monster trucks, and so on. There is a sheet of stickers with the set, but the number of them does not rise to the level of Monkie Kid sets, which is good. There are also a few pieces that are printed: the stunt cycle cowling, stunt cyclist’s helmet, side panels for one of the trucks, and a small gauge slope for each truck.

The sticker sheet.
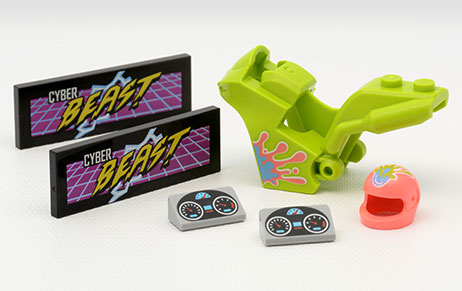
The printed pieces.
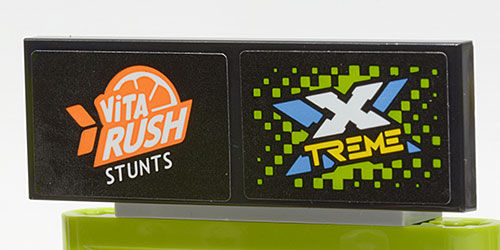
I did find it curious that in a couple instances there were two stickers provided for a single tile. Couldn’t these have been single 6x2 stickers for 6x2 tiles instead of two 3x2 stickers for a long tile? On the podium signboard they give us a 6x6 sticker. Maybe LEGO® has studies that show that six-year-olds can attach two crooked stickers on a single element more crookedly than one crooked sticker. Maybe the model got redesigned after the stickers had gone to print. It will be a mystery for the ages.
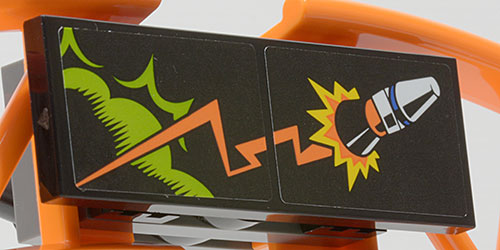
Did they really need to split this sticker in two?
And did they really need to split this sticker in two?
Actual set assembly is fairly simple; the set is rated for ages 6+, and that seems about right…except for putting the balloon tires onto the wheel hubs. For that you need an advanced degree in patience, persistence, and strong fingers. The six-year-olds may need a wee bit of assistance with the wheels.
There is a bit of an instructional lapse where it comes to the flaming hoop and the landing ramp. The ramp is clearly pictured on the cover of the instruction book for the hoop, but it is not included in that book’s pages. The ramp instructions are included in a separate book, along with the viewing stand. Along with that separation of process is an assembly step that is provided for, but not explicitly stated. The hoop section has a brick with pin and the landing ramp section has a technics brick with a hole. The pin fits into the hole (as one would expect), creating a cohesive single unit. Oddly, nowhere in the step-by-step instructions is it articulated that the ramp can connect to the hoop. There are some photos showing the ramp (maybe) connected, but if you don’t bother with the photos…the same two pages of “what to do” photos are in the back of each of the six books…chances are you are going to ignore them after the first book.
I actually missed this pin-to-hole detail when I assembled the set. After I completed all assembly I assumed that placing the takeoff and landing ramps was part of the play activity…one would have to figure out how far from the hoop each ramp needed to be placed. This situation is all the more funny as the barrel stand that attaches to the front of the hoop uses exactly the same connection.
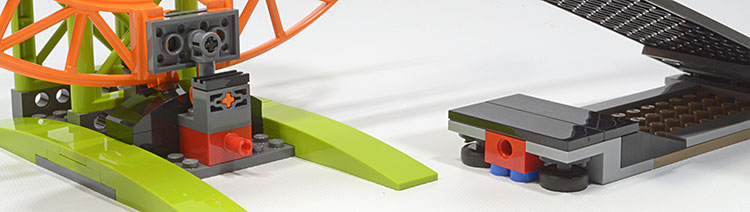
Red bricks: pin on the back of hoop and partner hole on front of landing ramp.
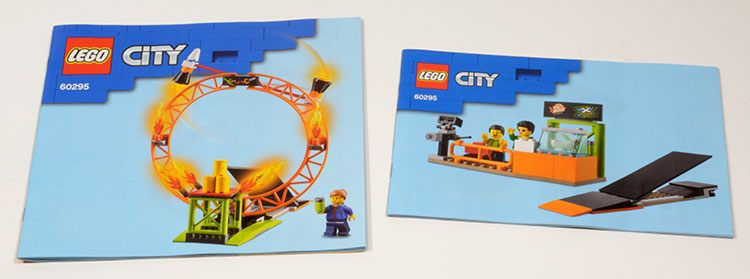
Left: hoop book showing the landing ramp connected, but ramp instructions aren’t in this book. Right: this book shows landing ramp assembly, but not how to connect it to the hoop.
This spread appears in the back of each instruction book.
Minifigures
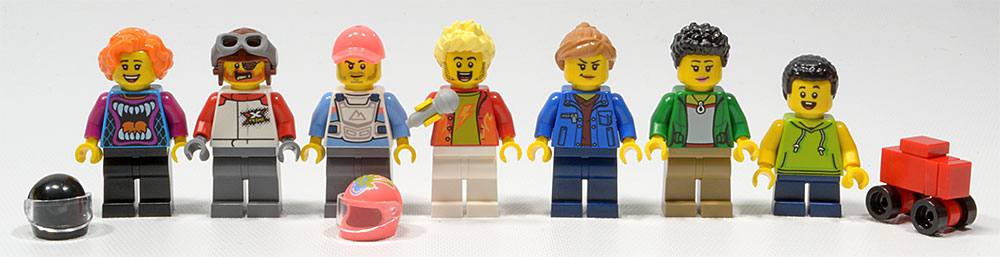
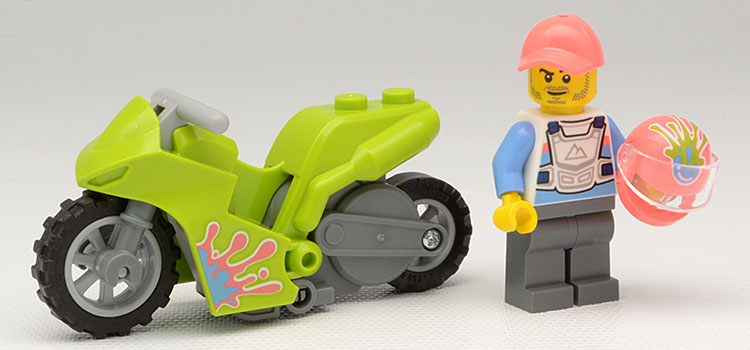
Contrary to the statement on LEGO’s web site that the set contains six minifigures (it shows seven, says six), this set actually does contain seven minifigures: Two monster truck drivers, a stunt cyclist, announcer, mom, young boy, and female audience member. The announcer’s head, torso, and the torso of the female driver are all unique to this set…at least so far. The cyclist comes with a decorated helmet in addition to his hat, the female driver comes with a plain black helmet in addition to her hairpiece, and the child has a toy truck.
Play
Here is where this set gets “xtreme”. There are lots of opportunities for all sorts of fun. When you’ve run through those opportunities, you can find some more. And then some.
A couple notes at this point: the motorcycle is not really a viable option for carpeted floor play. Given that the obstacles in the arena require them to remain stationary, LEGO has designed some “rubberized feet” under the ramps and the crush pit. The feet keep the obstacles in place instead of potentially being “pushed” when a vehicle runs into or over them. Score one for LEGO.
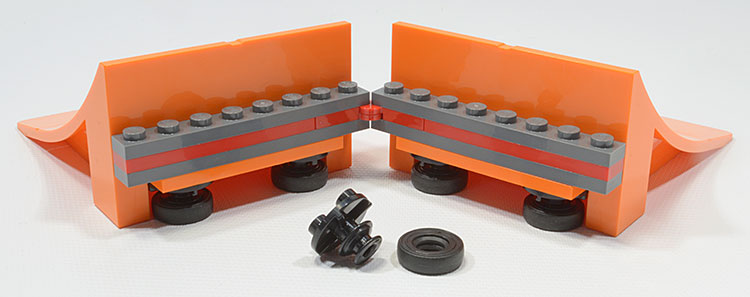
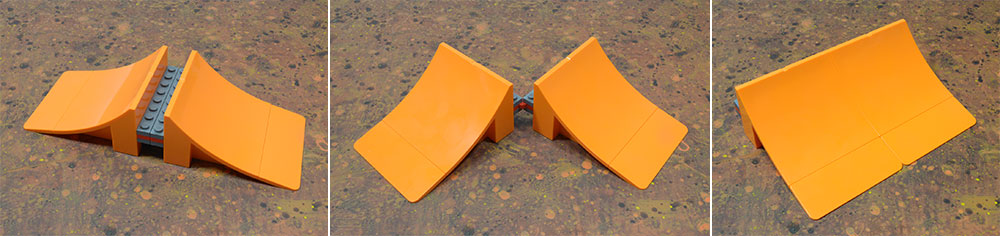
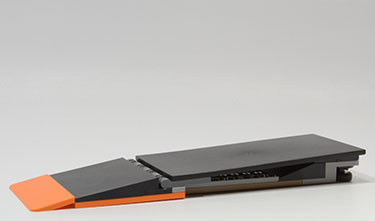
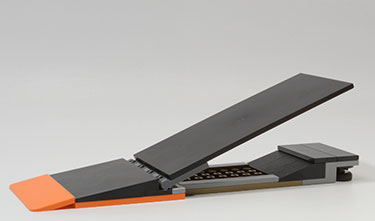
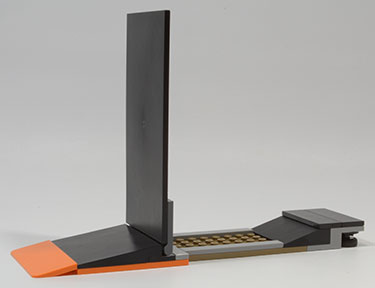
Takeoff Ramp The takeoff ramp is hinged in the middle. This allows for various positionings of the ramp. You can set it up so the two halves are opposing, at an angle, or side-by-side. The opportunities for mayhem involving the takeoff ramp get ramped up if you have a second stunt cycle. In side-by-side configuration the ramp is wide enough to accommodate the trucks.
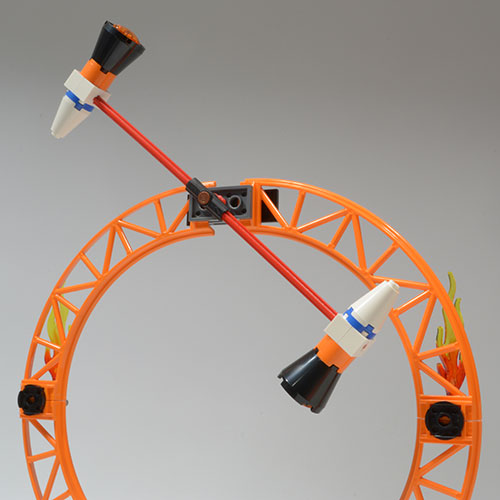
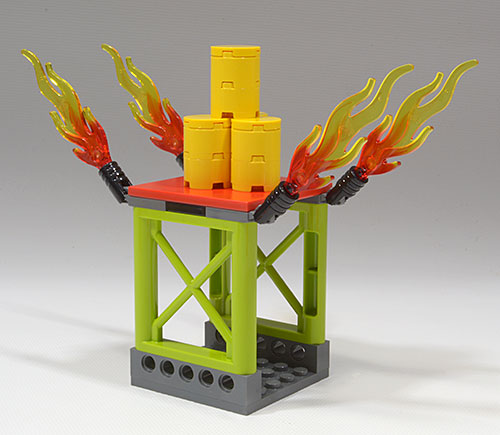
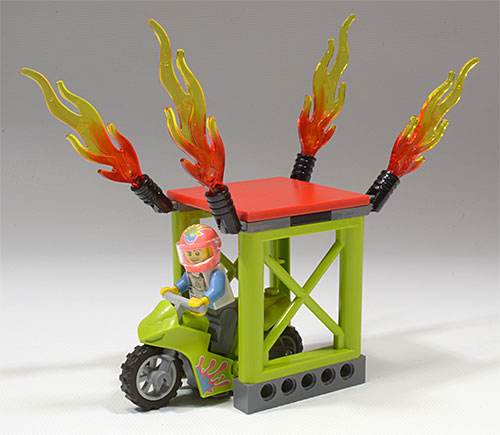
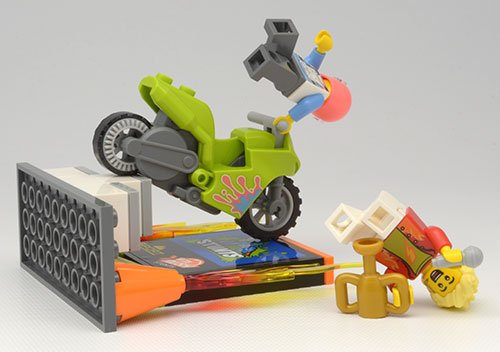
Hoop The hoop features a spinning rocket arm and knock-through barrels. Your stunt cyclist can go up the ramp and knock through the stack of barrels. Or your cyclist can go up the ramp over the barrels while trying to avoid the spinning rockets. Or both. The spinning rocket is a manual operation, and the hoop is a bit wobbly. It takes a certain degree of coordination for a single player to get the rockets spinning, then rev up the motorcycle and get it aligned to the ramp and going before the rockets slow to a stop. To effectively achieve the highest degree of stunt-tacular hoop danger requires two people, one to spin the rockets and another to operate the cycle.
The modular design of the hoop, barrel stand, and landing ramp components means you can arrange them in various configurations. The landing ramp can be used as a takeoff ramp. The barrel stand can be used without the hoop. The components can be attached or detached. And so on. Also, the hoop is wide enough to accommodate the monster trucks…why limit the mayhem?
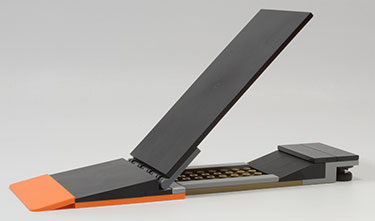
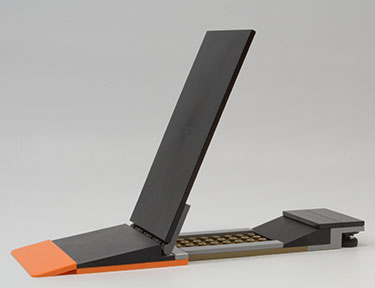
Landing Ramp The landing ramp is hinged and can be set at various angles. At the two highest angles the ramp essentially becomes a wall, but otherwise the motorcycle, given sufficient wind-up, can drive up it. The landing ramp can be aligned and sequenced with the takeoff ramp, making for a multiple-jump run. Frankly, the landing ramp is almost useless as a landing ramp attached to the hoop. The motorcycle is usually going so fast as to completely overshoot the ramp, or not going straight so the cycle completely misses the ramp.
Barrel Stand As mentioned earlier, the stand can be detached from the hoop section and used as a standalone obstacle. If the plate at the base of the stand is removed, a cycle can drive under the stand.
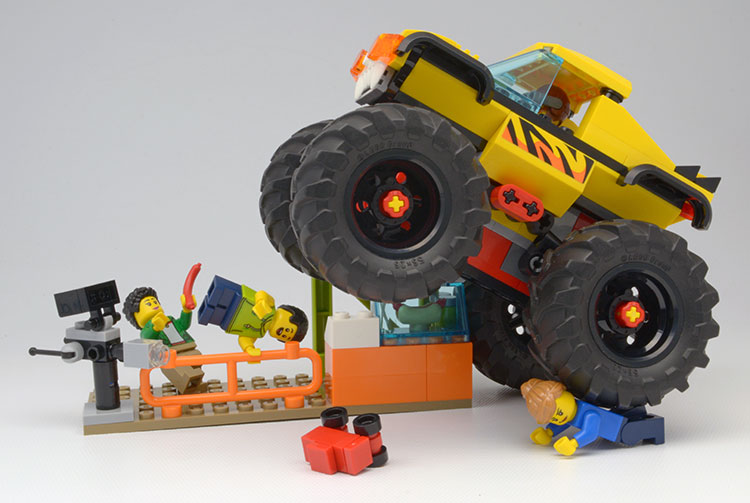
Crush Pit and Cars Two cars with “crushable” roofs can be fixed within the pit by seating them on provided slope bricks. The cars are stylistically identical except for the bonnet and headlights and they are otherwise movable…the wheels turn, a minifigure can fit inside, and they can be used as plain old cars if so desired.
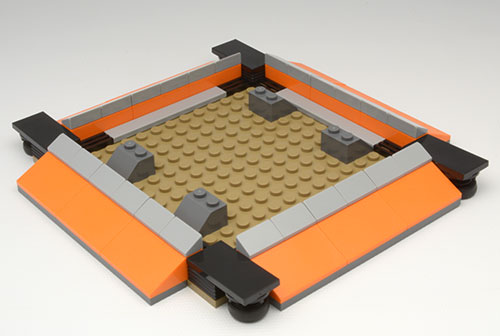
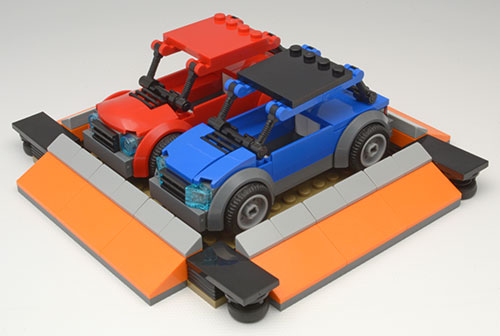
Generally speaking it does not require much force to crush the cars as the weight of a truck alone is sufficient to flatten a roof. If the roof supports are set very straight up-and-down, then the resistance to crushing increases and some manual intervention may be required. With or without the cars in the pit, the pit can be used as a jump obstacle for the motorcycle.
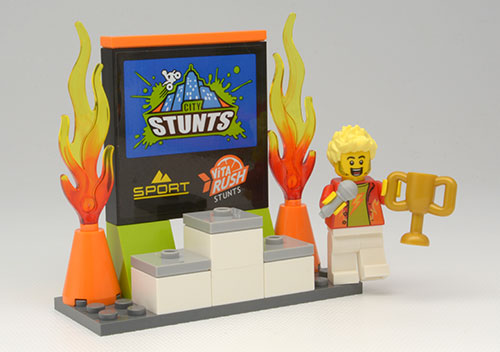
Podium In what is otherwise known as a bunch of bricks looking for a purpose, we have the podium. I really don’t know what is going on with this thing. It looks like there is a winner’s stand on the front. Except I don’t have any idea who could possibly win what, given this is a stunt show. The announcer has a trophy. Don’t know what that’s for…not like there is a race or competition as far as I can tell. With the 2x2 jumper plates topping the blocks, the minifigures can’t really stand on them. Okay. They can stand on them, off-centered. The giant poster behind the blocks proudly proclaims the venue as “City Stunts” and not “Stuntz”. Also “Vita Rush Stunts”. The design team must have missed an email from the marketing team on that one. Please additionally note the use of one big 6x6 sticker on the panel, not a collection of 2x3 stickers…for some reason. Otherwise, this is all the fun you would expect from an assembly of one plate, four bricks, one panel, two slopes, a couple of cones with flames coming out of them, three jumpers and a tile. Woohoo. I guess.
On the creative side, the podium can be used as a target for the stunt cycle to fly into and knock over. So there is some small redeeming value to the thing.
Hot Dog Stand(?) LEGO’s marketing materials (yes, the same materials that state this set has six minifigures) refers to this assembly of elements as a hot dog stand. First and most importantly, let us note that once again, in the time honored tradition of having the hot dogs being packaged in different numbers compared to buns…Hot Dogs: 2, Buns: 1.
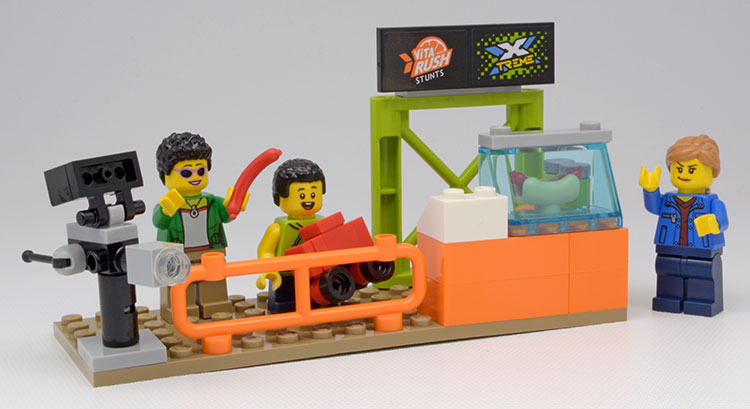
So. There is one hot dog in a bun, on display, in a hot dog showcase, next to what appears to be a cash register…but apparently no hot dog vendor. Must be self-serve. At the opposite end of the platform there is a television camera. As one would expect from a show promoter who didn’t get an employee to sell hotdogs and suffers from confusion on whether or not stunts is spelled “stuntz” or “stunts”, the tv camera is also not professionally manned and is left to the providence of a Mom and her kid with a toy truck. What could possibly go wrong? There is a thin protective rail to prevent the child from falling the dangerous and quite precipitous height of one plate. Also this thin rail will no doubt protect Mom, the kid, the unattended hot dog, and camera from flying debris and out-of-control monster trucks and skidding stunt cycles. No doubt.
This model scores just barely lower than the podium for fun because it is really near impossible to knock over with a flying stunt cycle. If, however (and this is a really really really big “if”) intentionally putting your audience and lonely hot dogs into a situation of extreme danger is your thing, then perhaps bonus points can be awarded for the tender thoughtfulness of this model’s inclusion in the set.
Stunt Cycle The flywheel-powered stunt cycle is a pretty rugged and powerful little unit. It got tested a lot. It easily will travel 10 meters with no problem, and likely could go another 10, but I don’t have 20 linear meters of clear floor for testing. It can make the ramp jumps with ease. Sometimes it lands upright, but often not. If it does land upright, it may continue to travel until it hits a wall or some other barrier…and it may bounce off that and continue to go. That said, I’m glad we don’t have a cat.
While testing the cycle jumping through the hoop, I noticed that the cycle would almost always veer to the right. It didn’t matter what the angle of the ramp was, or how far back the cycle started before getting to the ramp, or how fast or slow the cycle was moving. The cycle would go up the ramp, through the hoop, and to the right. On long straight run testing, the cycle would also tend to curve to the right. Curiosity got to me.
I stood the cycle up and put a finger on the handlebars to see if the cycle would tilt to the left. It would, but it would almost always immediately right itself. Same test, tilt to the right, and it would stay. Was it the cowling? That was short, so, no, I thought not. The back wheel is asymmetrical with the gearing on the right. Was the back tire off-center? Seemed like that might be it.
Needing to investigate further, I thought some photos were in order. First I took some photos from the rear of the bike: tip to the left, centered, and tip to the right. I put those on the computer and got everything lined up and then measured the angles. Tilt left: 8˚. Tilt right: 10.7˚.
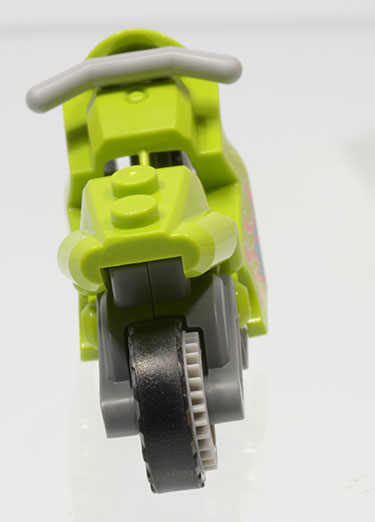
Tilt left: 8 degrees.
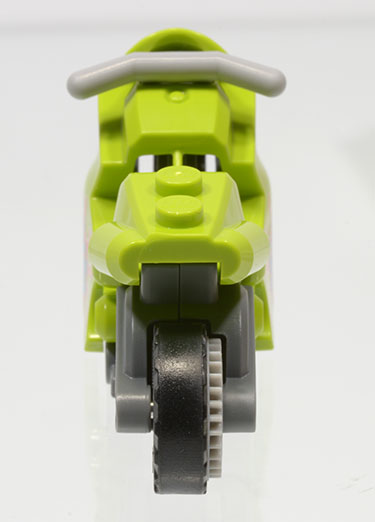
No tilt.
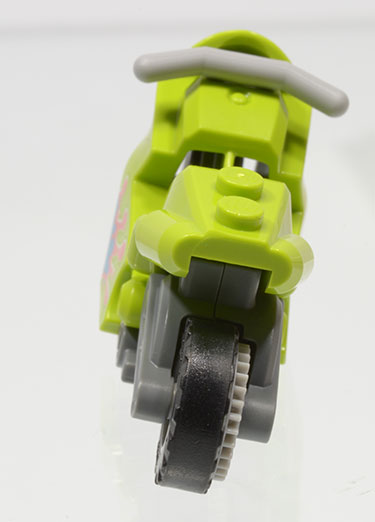
Tilt right: 10.7 degrees.
Again I thought it must be the back wheel offset. So I took the bike apart and, well, more photos. This set of pictures made it obvious. The front and back wheels were not offset as I had guessed. They lined up perfectly. But the cycle body was asymmetrical. The mold was shown to be right-side dominant. Presumably the center of balance was to the right of center. That would explain the tendency for the bike to right itself if tipped to the left, but did not explain the discrepancy in the tilt angle. Got out the calipers. Measuring from the center seam on the underside of the bike chassis, the left side measured about a half millimeter wider than the right side.
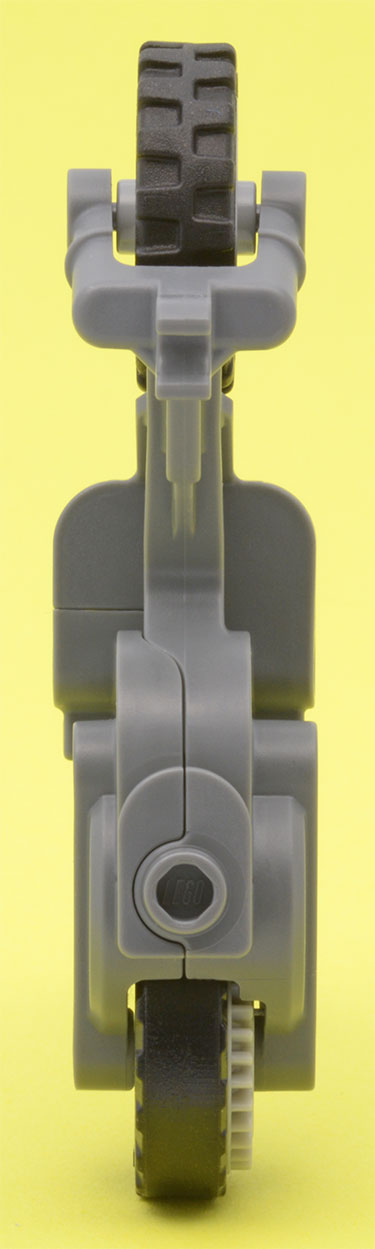
Top view.
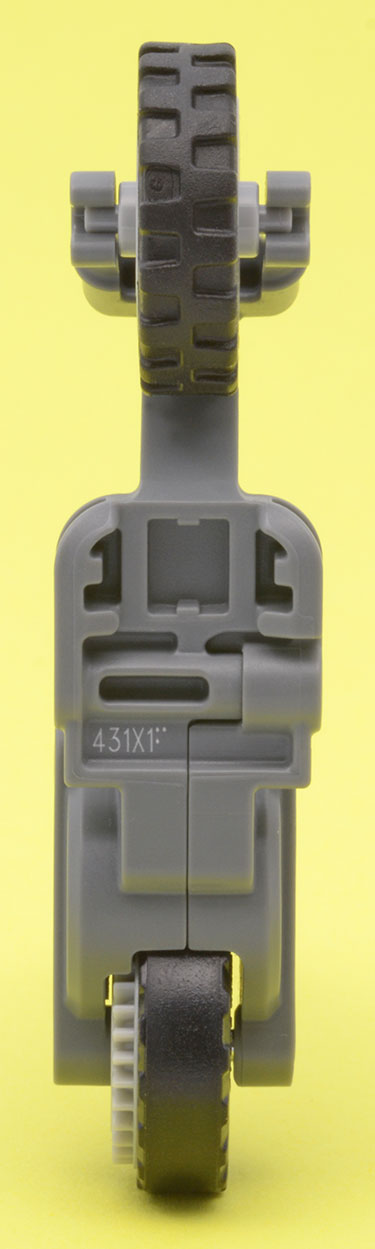
Bottom view.
All that said, I’m still not certain that the problem isn’t elsewhere. Or also elsewhere. Possibly the back tire is taller on the left side than on the right side. That could cause a turn to the right. All I can really say is that the bike tends to the right, and if you put the bike in front of you and give it a little push, the curve to the right is evident in the span of half a meter. Could it be just this bike? Possibly. But I have a second Stuntz bike, Rocket Racer, and that one displays similar behavior.
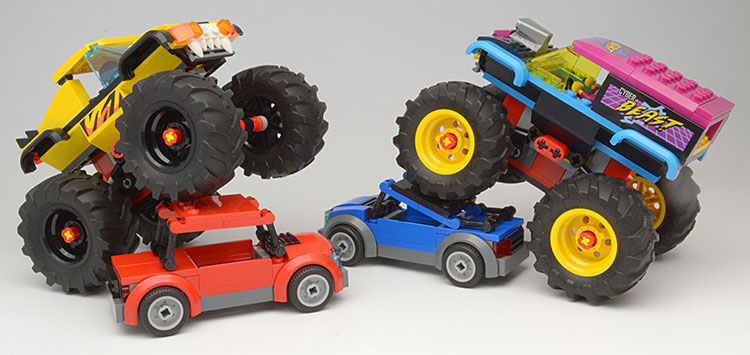
Monster Trucks The build for the two trucks is nearly identical minus about two dozen elements in the front and rear bonnet areas and color differences. This makes the upper portion of the trucks essentially swappable, so if you want your animal truck to have matching yellow wheel hubs instead of the prescribed black, it’s a change that can happen in a few seconds.
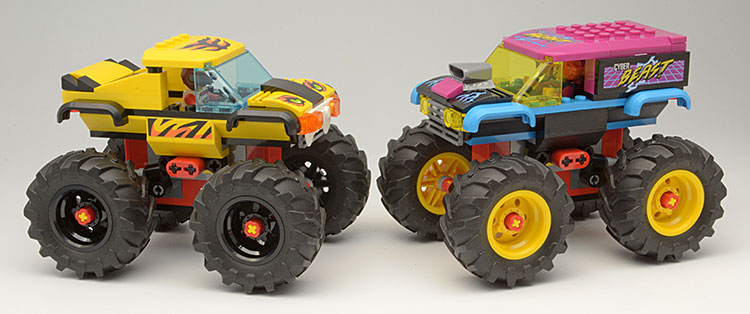
Monster trucks.
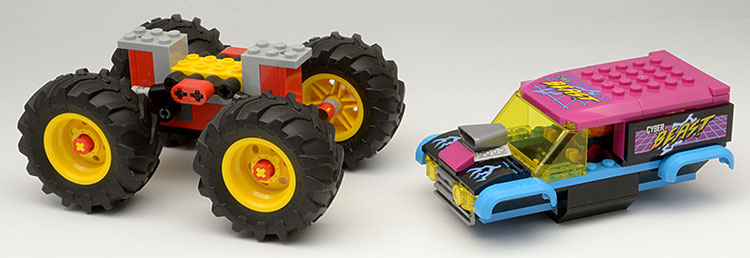
Top separated from chassis.
These trucks use the 56x26 tire introduced earlier in 2021 in 42122 Jeep Wrangler and 60287 Tractor sets. The oversized tires make for easy travel over the arena obstacles. Front wheels share a common axle as do the back wheels. The instructions show a flip maneuver where you push forward and down on the rear of a truck to get it to flip 360˚. To actually get the truck to land back on its tires takes some practice. I found it mostly ended up on the front or the top of the truck after a flip. Ending up on the side was a very rare occurrence.
Truck suspension is handled with a 4x2 technic beam combined with a rubber damper for each wheel. This construction gives the trucks a bit of bounce with the wheels being able to move closer to the upper portion of the truck. As the front wheel and back wheel pairs are joined, the motion allowed by the design is primarily a front-to-back rocking motion.
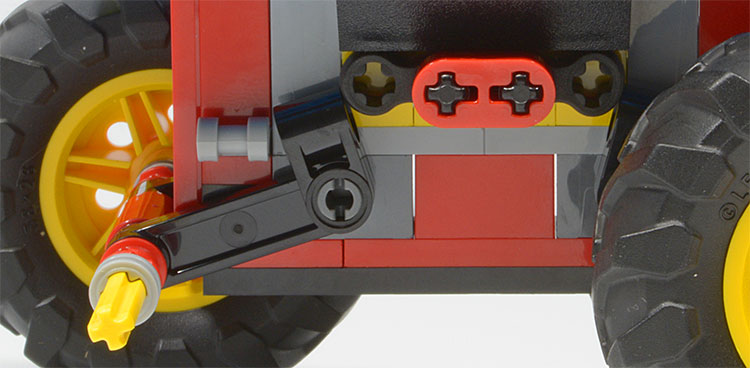
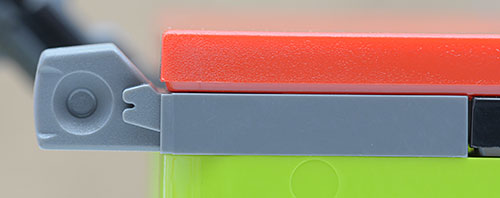
Suspension. The light gray plate limits downward motion of the technics arm, preventing the wheels from moving too far down and further under the truck. The rubber damper opposite the plate compresses and allows the arm to move up when pressure is put on the top of the vehicle.
The Randolph T. Fielding Absolutely Administrivia Section
There’s quite a bit for ol’ Randy to digest with this set. Actually, Randy is probably already hip, but you might be interested. Or not. Anyhoo…in the service of trivial posterity, here we go:
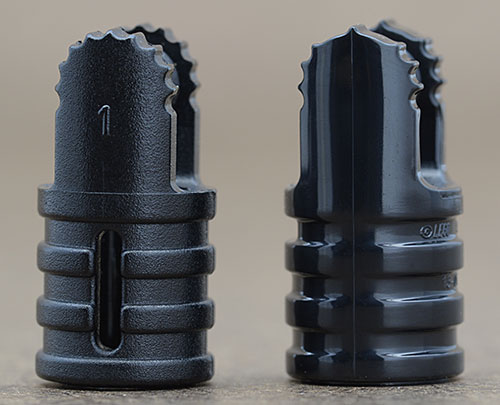
The technic 1x2 brick with two holes is of the pentagonal barb variant.
32000 bricks, bottom view. Left: triangular barb. Right: pentagonal barb.
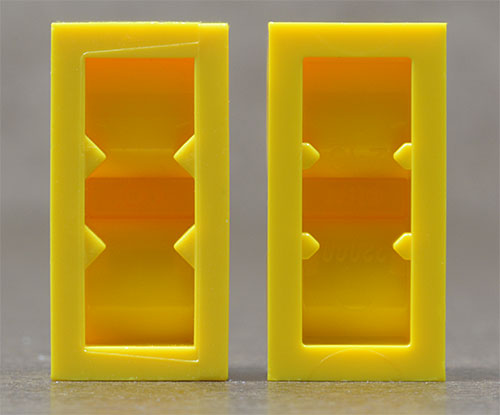
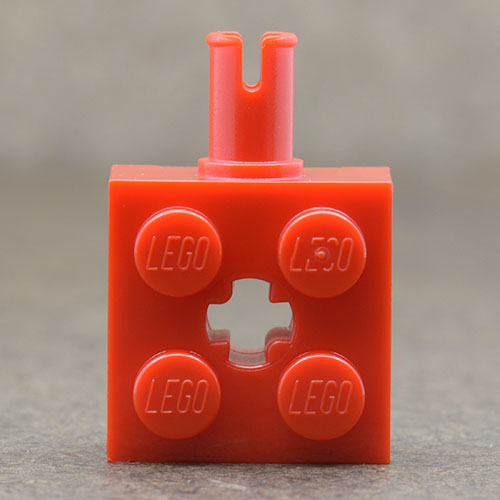
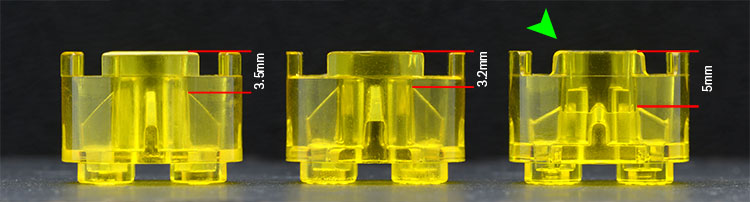
The 6232 2x2 brick with pin and axle hole has an asymmetrical axle hole. The pins have thin sidewalls and 2.6mm deep slot. If you are intimate with the peculiarities of the 6232 brick you know there is another version with a symmetrical axle hole, and thick walled pin with a 3.2mm deep slot.
The 1x2 hinge coupling used in this set is the 57360 version with 7 teeth.
Left: 30553 hinge coupling. Right: 57360 hinge coupling.
The set uses the 47915 1x2 male locking hinge plate.
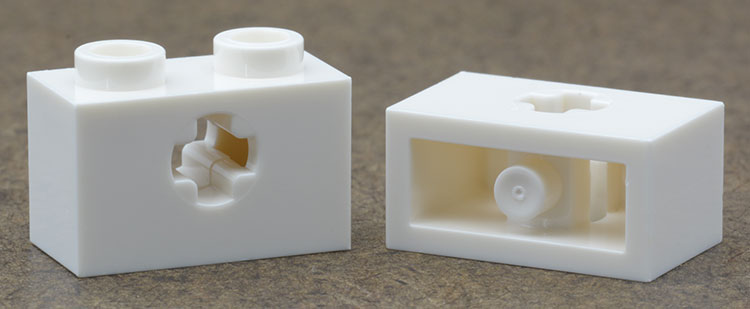
The 31493 1x2 technic bricks have symmetrical axle holes with open sides.
The 6143 2x2 cylinder bricks have asymmetrical axle holes with 5mm depth to support.
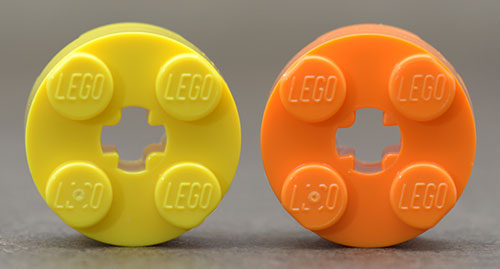
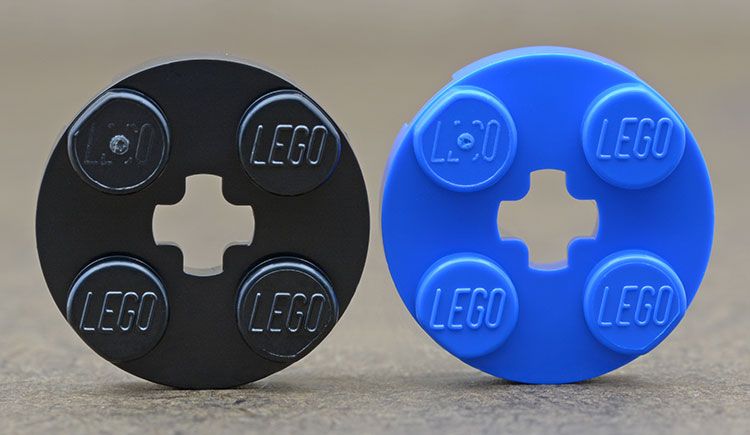
The 4032 2x2 round plates have symmetrical axle holes.
75538 and 75539 ramp pieces are new but not exclusive.
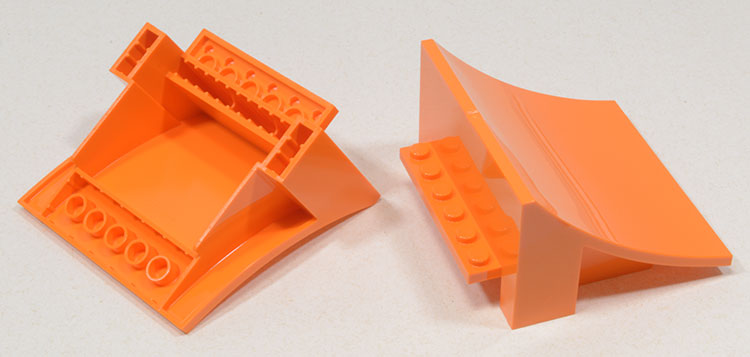
75538
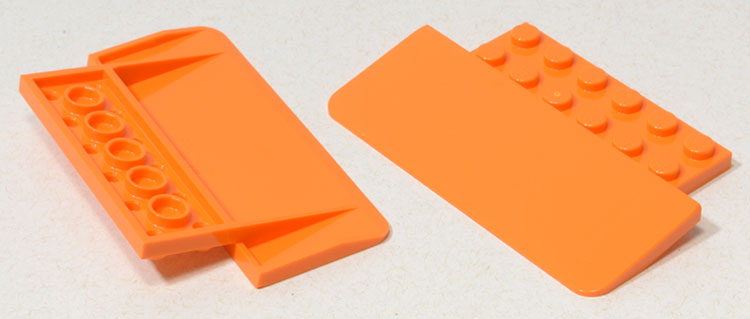
75539
Summary
While reviewing the set I had to ask my son to not play with daddy’s toys until daddy had finished his review and taken pictures. Seven times. Having the stunt cycle, ramps, and hoop set up on the table allowed for spectacular jumps, ensuing high speed travel to the end of the table, followed by an Evel-Knievel-doesn’t-get-to-the-far-side-of-Snake-River-Canyon fall to the floor, and ultimately the motorcycle and driver exploding into all their component parts. When one compares that action-fest to “please don’t play with the toys” you can see why daddy kept being ignored.
Xtreme-level recommended. So. Much. Fun.
Disclaimer
My thanks to LEGO for providing the review set. I attest under threat of being crushed by a monster truck that the opinions expressed in this review are uninfluenced by outside sources.
33495


