Set Review ➟ LEGO® Speed Champions 76910 Aston Martin Valkyrie and Vantage GT3

We will now review the final Speed Champions set of this 2022 wave! Have we saved the best till last? We certainly have an impressive selection of race cars here, with the sleek Vantage GT3 and very exotic Valkyrie AMR Pro. Will the Vantage turn out as good as it looks on the box? And will the Valkyrie turn out better than it appears? Will we get anything here to rival the brilliant Countach and Ferrari 512 M single-car sets? Read on and find out.
Box and Contents
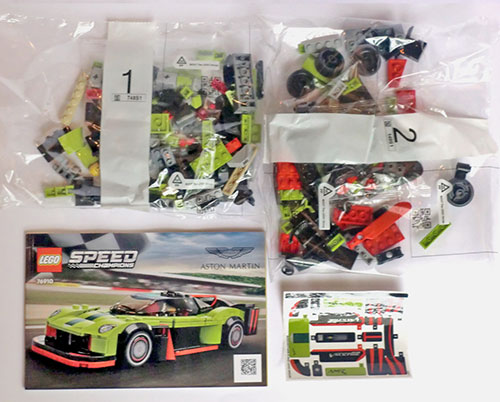
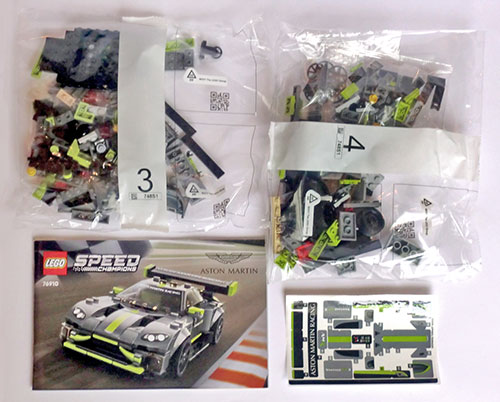
For each car we get two numbered bags, an instruction booklet, and opaque sticker sheet. The bag of wheel rims for the Vantage GT3 are in Bag 4. Parts of interest here include the new 2x3 curved wedge slopes with headlight prints in dark bluish grey, and the same parts, both printed and unprinted, in lime green. There’s a pair of tan 1x2 vertical clip plates (78256), two yellow 2x2 round corner plates (79491), pointy 4x2 wing plates in lime green (65429/65426), and new for 2022, two 1x2 horizontal clip plates (63868) in trans clear. There’s also the new printed Valkyrie windscreen piece, which is a great new part that I hope we’ll eventually get with a more reusable generic print.
I’ll be looking at the Valkyrie build first, and then the Vantage GT3, before comparing the two and evaluating the set as a whole.
Aston Martin Valkyrie AMR Pro Build Process
Bag 1 will build the driver and the rear half of the car. The driver is female, with a short bob cut hairpiece in addition to the helmet. Interestingly, the colors are reversed, with a dark grey driver here for the lime car, and a lime colored-driver for the dark grey Vantage GT3. The build starts with the rear axle and diffuser, before moving forwards via click-hinge plates and axle connectors to the driver’s compartment. There is no standard chassis part here, with the compartment instead being built from a pair of 2x6 axle plate/bricks (65635) positioned lengthwise.


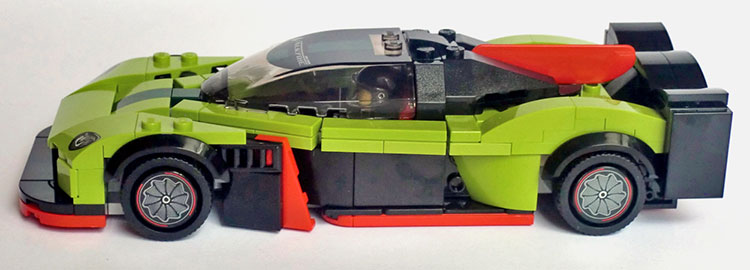
There isn’t really any space for an engine in the back due to the internal complexity of the build. The side panels in front of the rear fenders use unprinted versions of the new 2x3 wedge slopes, which perfectly match the shaping here on the real car (though this is obscured on the box art). Flat silver candlesticks are used for the exhausts above the nicely hollowed-out diffuser area, and the wavy rear wing looks much better than I had expected it to.
Bag 2 then adds the well-integrated red shark fin and some cleverly built side-skirt detailing before building the front of the car as its own separate sub-assembly. Black 1x3 doors are used as guide vanes inside the front intake, which is nice parts use but does force the front bonnet to be positioned higher than I’d like it to be. The side vanes behind the front wheels are attached with the new trans clear 1x2 clip plates. The front end of the car is then securely connected to the main chassis, and lime green hinge-plates and tiles are used to complete the bodywork. The instructions show how these hinged sections need to be temporarily flexed outwards when inserting the driver, whose arm will then fit underneath.
Features and Functions
The finished car rolls well, and is pretty sturdy, with only the guide vanes behind the front wheels wiggling around a bit. Driver access is complicated by the hinged side plates, and the lack of any engine detail in a car this big is unfortunate. The printed 2x2 wheel rims look really good though, and it’s nice to also have a spare set of rims from the Vantage GT3 that can be used here (though black 4740 2x2 dishes also look great as a third but not-included option).
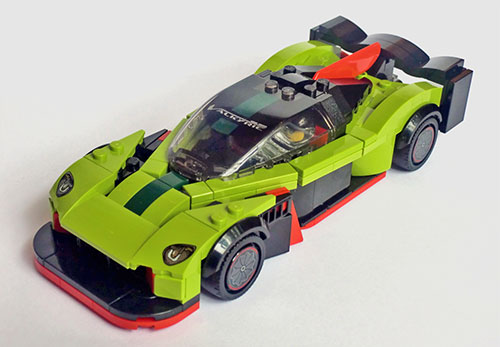
Overall Impressions
There’s a lot to love here, from some really ingenious building techniques to the striking colour scheme and nice printed elements. The rear half of the car in particular is exquisitely sculpted, and the design work involved in splitting the front fenders from the cockpit is also impressive. Unfortunately this is marred by the awful proportions of the car as a whole. It is simply far too long for its width. The cockpit is also positioned too far rearwards, and the bonnet should drop below the height of the front fenders. It seems that all the focus has gone into replicating certain design details at the expense of the overall proportions, much like with the Mercedes Project One, but to an even greater extent here.

Moving to an 8-wide standard was supposed to fix these proportionality issues, but here we have returned to the long and skinny sausage cars of the 6-wide era. The box art even borders on false advertising by using a lens effect to effectively compress the depth of field and obscure the model’s true proportions. (Note also the silver outer wheel rims absent from the real build.)
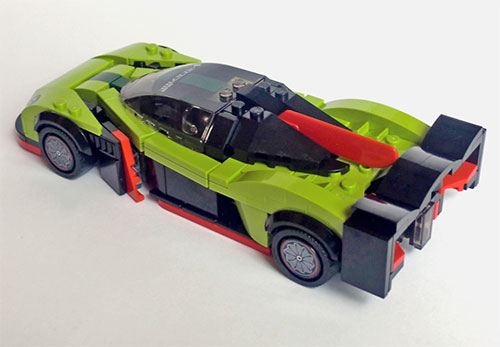
Now you might think that these proportions were necessary to fit the split fenders at the front and the shark fin at the back. But that’s not actually so. It turns out to be quite possible to rebuild the Valkyrie over a 2-stud shortened wheelbase while retaining all the critical design features, sturdiness, and functionality. See below for a comparison, and as an added bonus we’ve even made instructions available so you can try this out for yourself!
Official set.
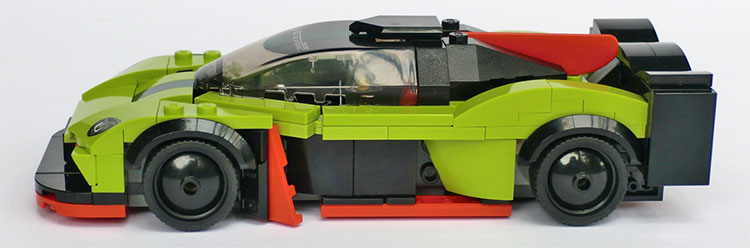
Modified set shortened by 2 studs (some additional parts used).
Modified set
Modified set

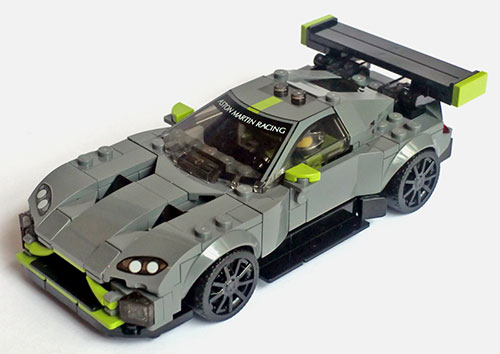
Aston Martin Vantage GT3 Build Process
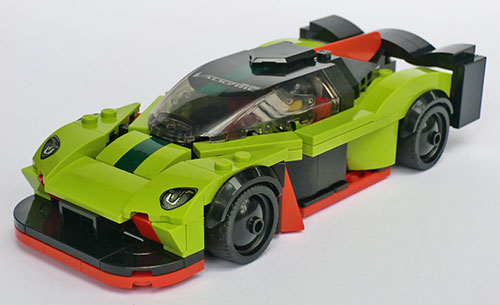
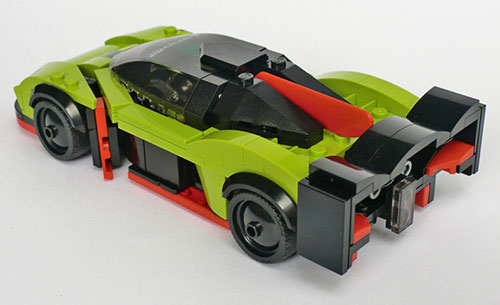
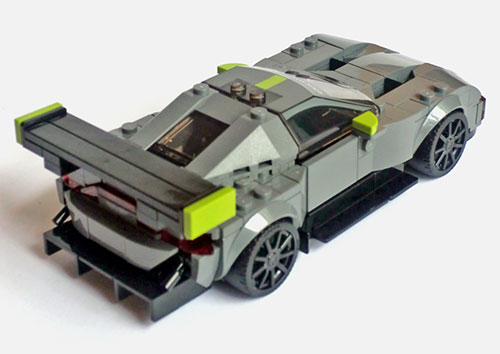
Let’s see now how the Vantage GT3 compares. Bag 3 builds the driver, chassis, and back half of the car. The spectacled driver wears a lime green AMR jumpsuit and includes a hairpiece in addition to his helmet. As mentioned earlier, you’ll need to swap drivers with the Valkyrie if you want them to match the car they are driving. This model is far more traditionally built than the preceding Valkyrie, but gets interesting when constructing the rear diffuser and tail lights. I particularly like the 32828 1L bar-studs used as cable supports for the huge diffuser. Also very nice is the 1x2 plate with printed Aston Martin badge at the back. After building the satisfyingly complex tail light construction, we add lime green seat backs (with a hint of bucket-seat shaping) and then attach the angled rear window which is cleverly fixed in place at the appropriate angle.


An instruction error next says that we are to open Bag 2, but of course this was already used on the previous car. Bag 4 next builds up the sides and front of the car. The side door panels are simply built, yet the coke-bottle shaping is great. A light bluish grey 2x4 brick is dropped in the front where the engine should be, so I recommend replacing this with a 2x2 brick and a 50943 engine block.
The iconic Aston Martin front grille is perfectly captured with the use of lime green brackets and horn elements, as part of a splitter plate sub-assembly which is then attached before building up the rest of the nicely vented front bonnet. A simple hinged spoiler and then wheels are added to complete the build.
Features and Functions
The model drives well on its wheels and there are no issues here with cockpit access or seating the driver. The rear spoiler is technically adjustable in angle, though this seems to be more a result of how it is attached than a deliberate play feature. The absence of any engine detail is a missed opportunity, but is easy to correct if you have the parts.
Overall Impressions
I am very happy to round out this series of reviews on a high note. The Vantage GT3 is an absolute beast. While fairly conventional in design (at least compared to the Valkyrie) it includes some beautiful detailing for the front grille and rear tail lights, looks fantastic even without stickers applied, and does an outstanding job of capturing the look and proportions of the real car. In fact, other than adding an engine, the only other change I made was to add a couple of extra black cheese slopes on exposed studs inside the bonnet vents. The only further flaw I can point out is the unprinted and studded 1x2 section of the windscreen/roof which provides an unintentional sunroof. The Vantage GT3 has turned out to be my favorite SC car of 2022, though very closely followed by the Countach and Ferrari 512 M.
Conclusion
This double-pack set is hard to rate, with one car so much better proportioned than the other, and yet even the Valkyrie turned out really nice after rebuilding it on a shorter wheelbase. Both the Mercedes and Aston Martin double-packs have a lot to offer, but I have a much easier time recommending this set given that at least one of the two cars here looks fantastic without any significant modification.
So what can be said of the 2022 Speed Champions line-up as a whole? The Vantage, Countach, and Ferrari are all top notch. Not perfect perhaps, but impressively close. The Lotus was nice, but marred by a poor print layout, and the remaining three—Mercedes F1, Project One, and the Valkyrie all required some significant rebuilding to really look good. So 3 out of 7 isn’t all that great, but then that doesn’t really give a fair picture here because even the flawed cars turned out pretty good after a bit of work, and every model was fun to build.

All seven 2022 cars lined up subjectively from best to worst.
The 2022 range all feature incredible building techniques, and make excellent use of brackets and new parts. Though the Lotus struggles a bit without printing, they otherwise present a solid selection of exotic and colorful vehicles. It’s also really great to finally see a selection of cars that doesn’t rely on stickers for shaping and detail. Critically, this is the first SC line-up to really sell me on the 8-wide scale. The SC theme has come a long way from humble beginnings, and has finally shown that LEGO can make detailed, realistic, and well-proportioned minifig-scale cars with brick-built detail.
So what can still be improved? Well, the next logical step would be for the LEGO designers to start putting engine detailing into every model! I’d also like to see extra rims included in every set where they can possibly be used. And most importantly, please prioritize overall shaping and proportions over specific design features. Detail is great, but not at the expense of returning to the long and skinny sausage cars of the 6-wide era. Hopefully the future will bring less like the stretch-Valkyrie and misprinted Lotus, and more like the amazing Countach, Vantage, and Ferrari 512 M.
We wish to thank LEGO for providing this set for review. The opinions in this review are not supported or endorsed by LEGO.
33515


