
Set Review ➟ LEGO® 21058 Great Pyramid of Giza
- Theme: Architecture (18+)
- Part Count: 1476 pcs
- Price: €140
- Dimensions: 44x40 studs (35x32cm)
- Release: June 2022
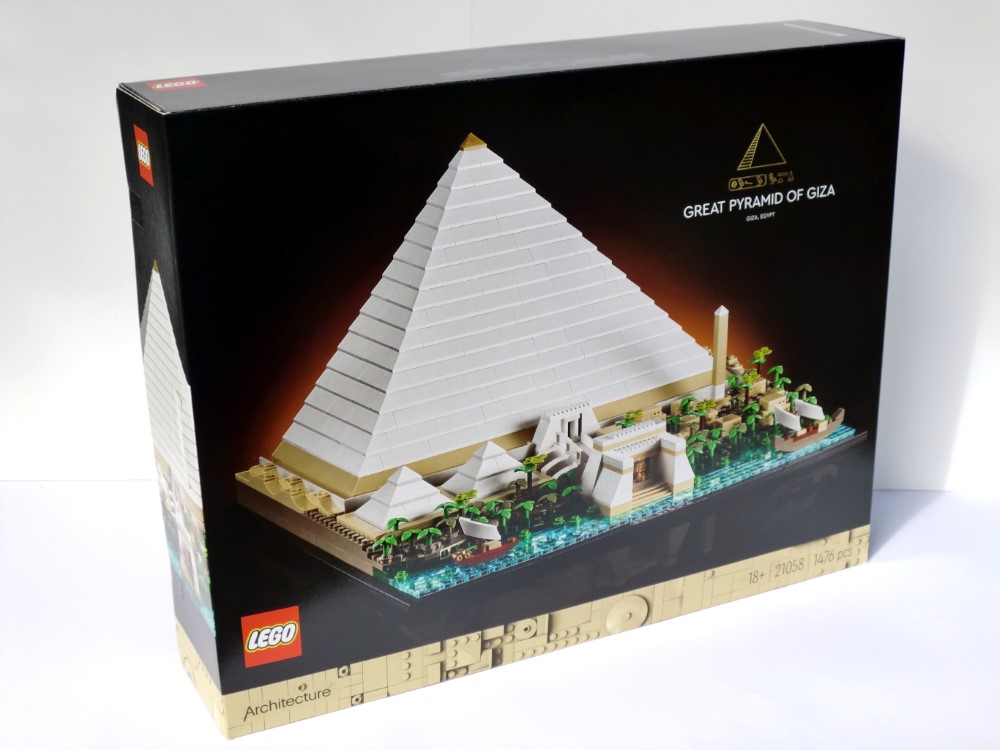
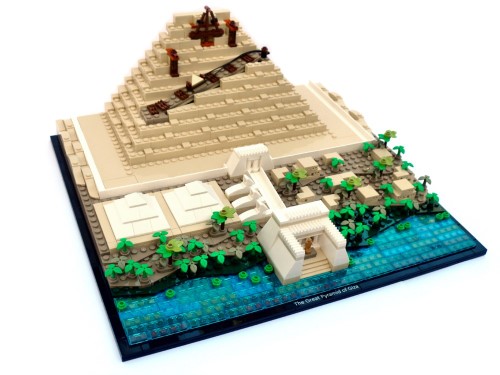
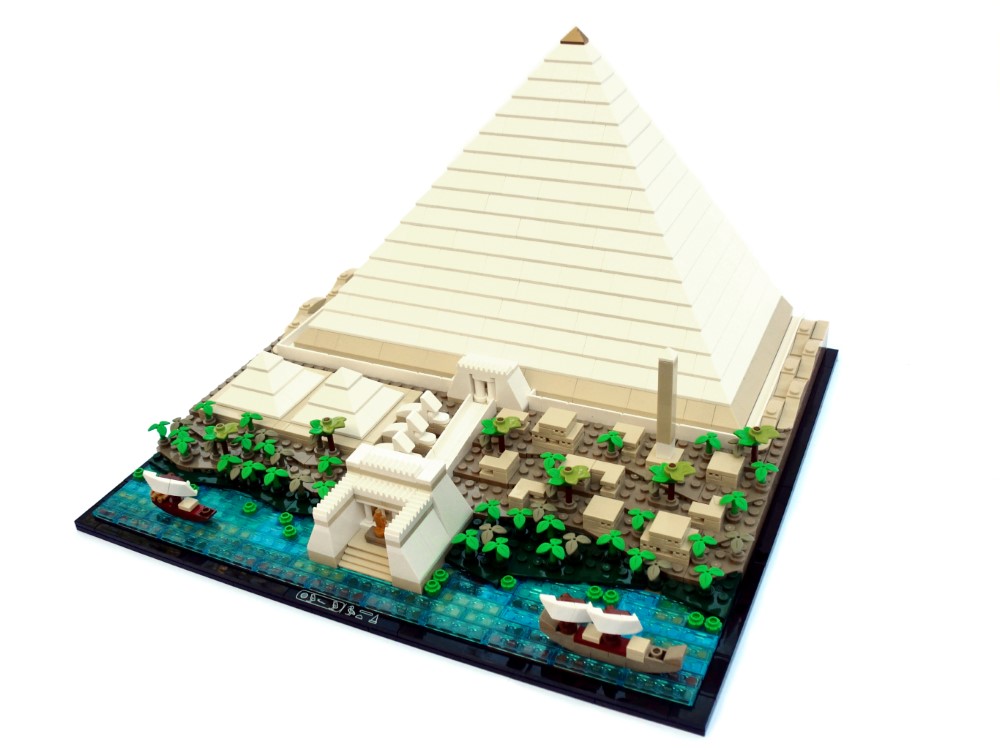
When we think of LEGO architecture we typically think of modern towers and skyscrapers, yet the ancient pyramids of Giza represent one of the greatest architectural achievements of humanity, with Khufu’s pyramid – the largest of them, and the one modeled here – standing as the tallest man-made structure for over three and a half millennia. Most of us will also mentally picture the great pyramid as seen now, tan-coloured and weathered, whereas LEGO have instead boldly depicted how it looked when newly built – with its now-lost smooth white limestone casing and golden capstone on top. Also included is a frontal diorama of other structures and foliage between the main pyramid and the Nile river (or rather a man-made canal diverted from it). Perhaps most controversial though will be LEGO’s decision to include only half of the great pyramid within the display. Will this choice be justified, and what other features might it enable? We’ll get to that, but first let’s unbox this thing and get it built.
Box and Contents
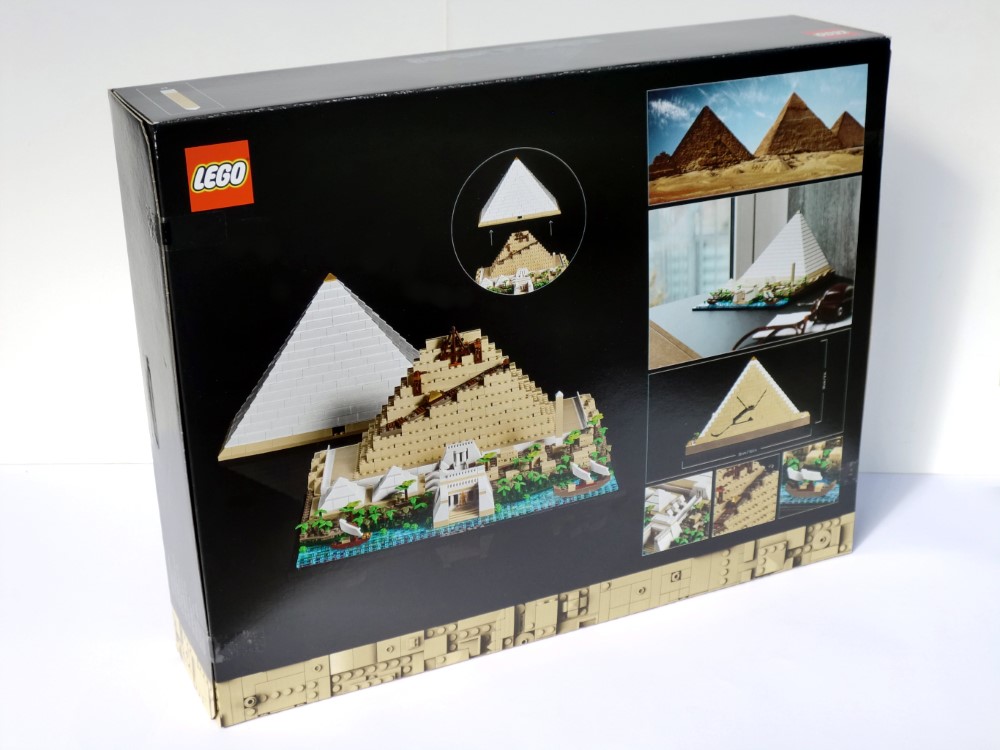
It’s quite a large box, in the 18+ styling, with the completed model on the front and all of its features highlighted on the back – and here was my first surprise! Not only does the half-pyramid feature a cut-away view at the rear, showing various internal chambers and passages, but the white outer casing is completely removable, revealing an interior model of the pyramid in a state of construction!
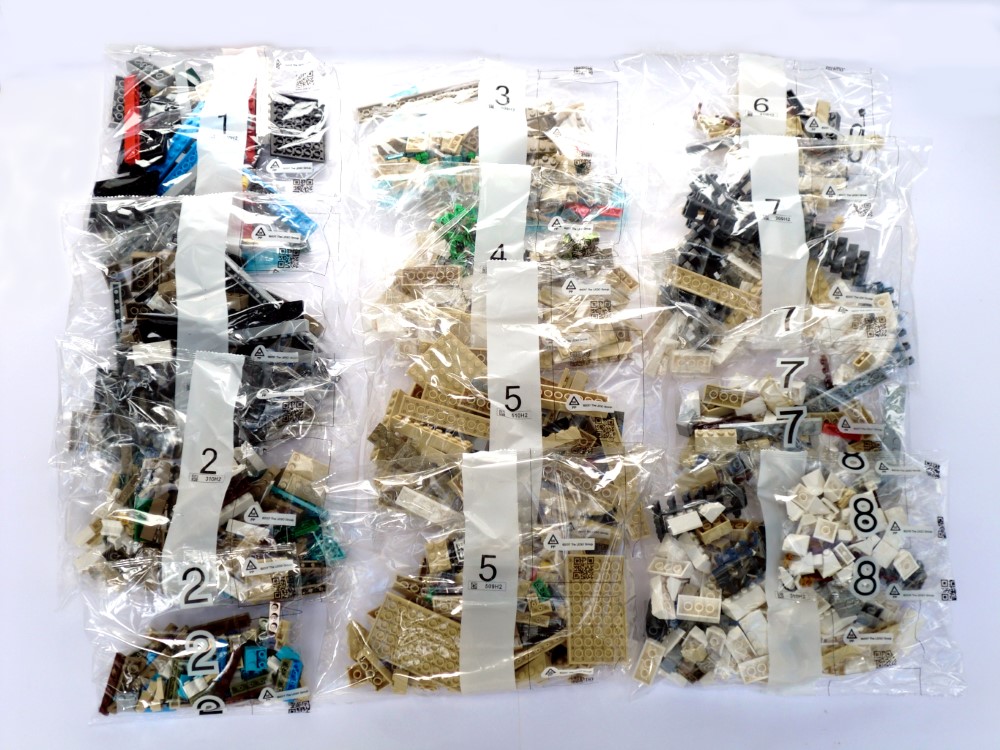
The opened box contains a significant volume of parts, comprising 13 bags numbered #1 through #8, plus a bagged instruction book, no stickers(!), and an interesting sheet explaining that current sets may contain a mixture of plastic and paper packaging as the plastic bags are phased out (though as you can see above, I had plastic only). If you like white 45deg slope bricks, then this is the set for you, with 100 2x4 slope bricks and 48 2x2 corner slopes. The only other part of note, beyond the two printed tiles which we will see later, is a single Dark Bluish Grey 1x2 rounded brick with open center and bars (#77808) which is new for 2022.
Build Process
The instructions begin with some info on the real pyramid, a note from the design team, and some detail explaining the various features and components of the completed build. Bags numbered 1-4 will build the base and forward diorama, while bags 5-8 will build the pyramid interior and outer shell. I strongly recommend building on a hard flat surface rather than carpet, as the initial base frame is not very sturdy during construction.
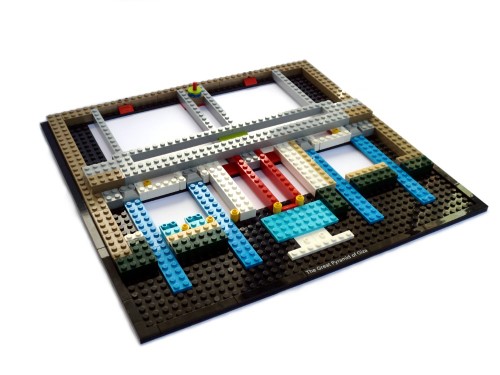
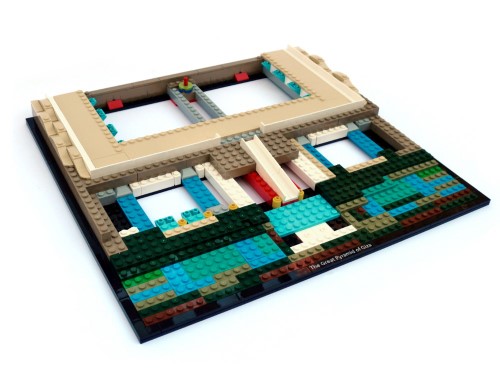
Stage #1 builds the base frame, which is very hollow in the center yet more than strong enough once complete. The 1x8 printed tile is added at the front of the frame, and we are given a choice of two alternative prints! See later in this review for the second option! Stage #2 then builds the perimeter wall around the main pyramid, complete with rolling sand dunes along each side, a central causeway sloping down to the river edge, and the multi-coloured plates which will provide texture for the riverbed.
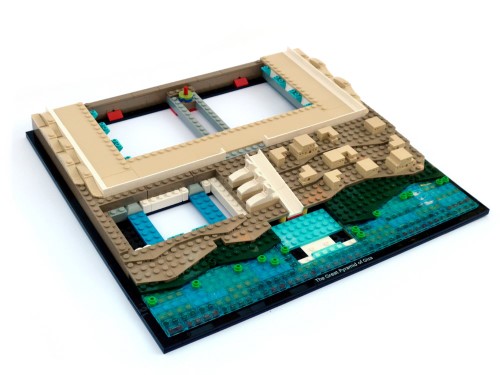
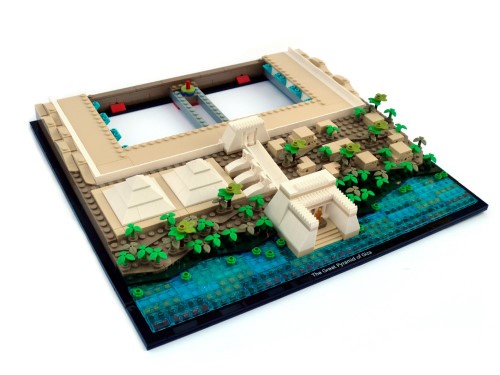
Stage #3 adds the surface of the river with trans tiles and plates, three mini sphinxes next to the causeway, and the buildings on the right side representing the workers’ village for housing those who worked on the pyramid during its 27 years of construction (thankfully the LEGO version assembles much faster). Stage #4 then adds the foliage (mostly triple-leaf stems #37695 in Olive and Bright Green) and two smaller pyramids on the left side, which were tombs for Khufu’s family – there should really be three of these, but the third one would be to the left outside of the model’s frame if correctly positioned. These two mini pyramids also contain 1x2 ingot sarcophagi, which is a nice touch for something that you’ll probably never see again once built. Also built here is the Valley Temple at the river-end of the central causeway, which features a minifig statuette and steps built with the clever yet now familiar technique of overlapping 1x4 panels.
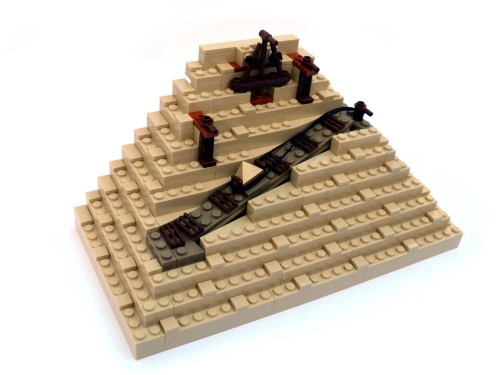
Stages #5 and #6 build the interior of the main pyramid structure. This has been deliberately built to be easily removable so that you can choose to display it as a separate unit if you wish, leaving only the hollow outer casing on the main display. The front features a large crane and two hoists, plus a cleverly angled ramp where ropes are being used to lift a sledge over rollers to transport one half of the pyramid’s golden tip. The rear features a cutaway view (see picture later in this article) showing the entrance tunnel, ascending passage, Queen’s chamber, Grand Gallery, King’s Chamber, and two air shafts.
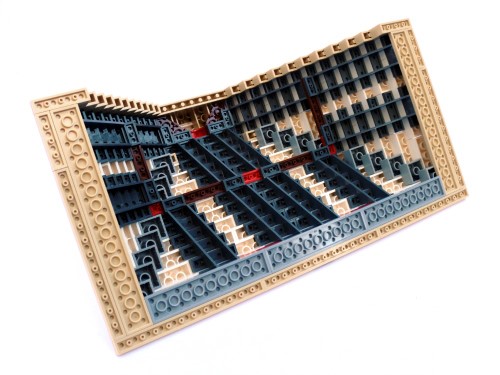
Stages #7 & #8 build the pyramid’s outer casing and complete the model. The outside faces are simply built with White 45deg slope bricks, but to make the build strong enough for easy removal the whole thing is cleverly built on a frame of large staircase parts (#30134). Once this is built, the model is finished off with the addition of a tall obelisk in the workers’ village and two sailboats for the river.
Features and Functions
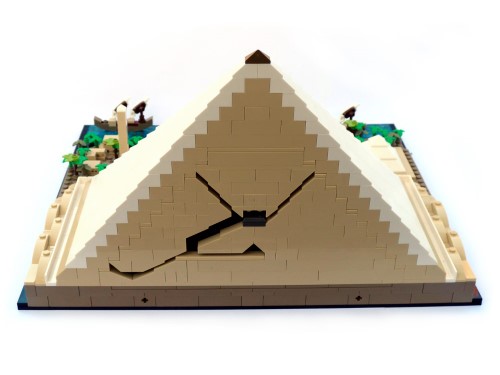
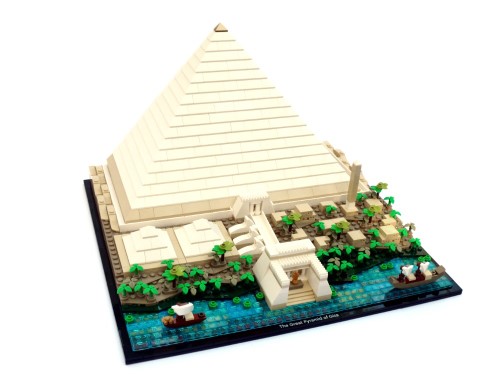
The model is quite sturdy and easy to move around, despite being rather hollow underneath. The pyramid’s outer casing is also quite strong, and detaches with a single-stud connection at each corner. Tiles enable a smooth and seamless connection at the rear between the outer casing and internal build. We get a satisfying and pretty accurate cutaway view at the back, and also visible here are two axle holes at the base (a single 2L axle is also oddly mounted underneath the pyramid’s interior build). The idea is that with a second set you could potentially build and attach the rear half of the pyramid. I’m not sure how feasible this is, as even ignoring the doubled cost you’d have to modify things significantly to avoid adding a second village and river behind the model.
Overall though, I feel the design team has added as much functionality as you could reasonably ask for here. Like most other Architecture sets, this is primarily a display model, so any added functions are bonus. You can choose to display the model either as completed or as still under construction (with the outer casing removed), and either the outer shell or the inner build can be individually removed and displayed separately. One other very nice feature, mentioned earlier, is the alternative printed tile. In place of the standard English-language label, you can choose instead to use a tile naming the pyramid in ancient Egyptian hieroglyphs!
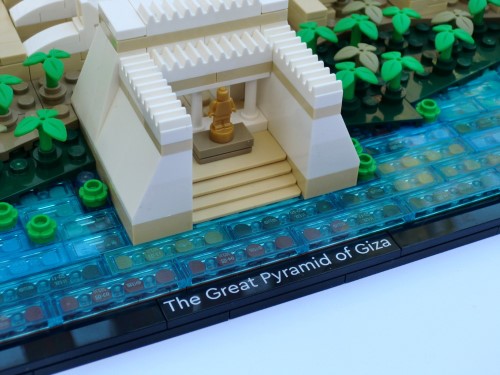
Standard English printed tile
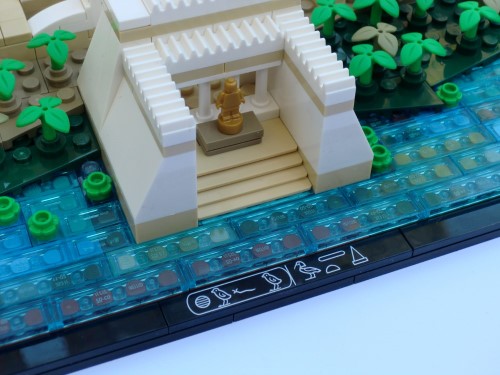
Alternative hieroglyphic printed tile
I believe this translates to “Death Star chicken snake chicken, duck igloo garlic bread party-hat”, although the instruction booklet suggests the less interesting “Khufu’s Horizon” as a translation of the pyramid’s original Egyptian name.
Overall Impressions
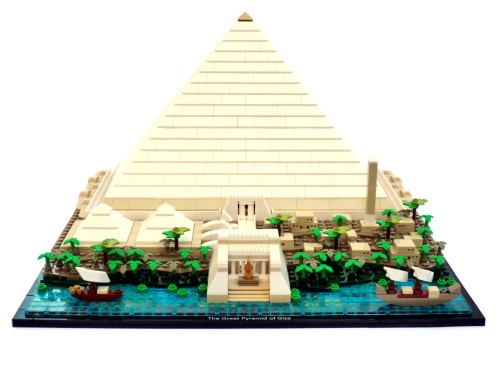
Now that we’ve covered the build and features it’s time to answer the big question: Why are we only getting half a pyramid? Imagine if we were to get only half of an Eiffel Tower! But actually I’m totally fine with the choice that has been made here. Firstly, the model is already 40 studs deep, so adding the rear half would make it rather awkward to display. You could of course offset this by sacrificing the front diorama and river, but all of the front detail really helps contribute a sense of scale and grandeur that would be lost with only the pyramid by itself (even given the great interior).
Secondly, adding the rear half would significantly affect the part count and therefore the price, without really adding anything functional beyond completing the outer shape. And really this model is at its best when viewed squarely from the front anyway, looking over the river and through the trees to the massive pyramid in the background, making the missing rear half less noticeable. But I can understand if others still find this to be a sticking point, and I’m sure some will want to add the rear half for the sake of completeness. At least Lego have taken this into consideration, providing an axle and indicating attachment points.
It’s also fair to say that some artistic license has been taken with the layout in front of the pyramid. Most noticeably, the length of the causeway and the corresponding distance from the pyramid to the water’s edge is hugely compressed. But again, I feel this is something that works just fine for the model, as you’d otherwise either need an absurdly deep model or you would have to remove the river entirely. So what we have is I think an excellent compromise between accuracy and display value.
A couple of other practical issues bear mentioning. Firstly, this will be a potential dust trap and difficult to clean, with its many exposed studded horizontal surfaces. Secondly, the bright white bricks in the pyramid casing may also yellow towards a tan shade over time – though I suppose this could actually be considered a clever touch of realism! All in all then, I think LEGO have produced an impressively detailed and functional representation of the oldest and only remaining entry in the list of Seven Wonders of the Ancient World.
We wish to thank LEGO for providing this set for review. The opinions in this review are not supported or endorsed by LEGO.
33527